All posts by admin

QuickBooks Error 6000-82 or 6000-106

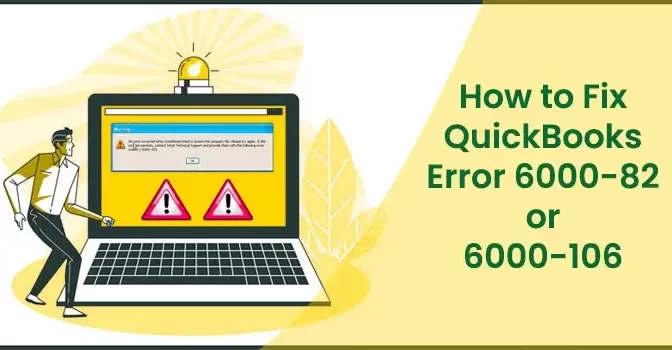
Despite being one of the most preferred accounting solutions, QuickBooks throws a wide range of technical issues. When working with the program, you may receive multi-faceted error messages on your screen. QuickBooks error 6000 82 or 6000 106 is also an annoying error code in the list that crops up when a user tries to open a company file. Already seeing this error message on your screen and need help in resolving the issue? Are you aware of the possible reasons that can promote the error code 8000 62 in QuickBooks? Well! All your queries are covered in this post so that you can find the root of the problem and fix it. Let’s start!

If you want a smooth and hassle-free troubleshooting solution from the QuickBooks experts, give us a  call on our QuickBooks customer service number

Meaning Of QuickBooks Error Message 6000-82 or 6000-106?

“QuickBooks is not able to access the organization document, as it is stored on the other PC.” This error message rolls out when a user tries to open the company file. This error is closely related to opening your company file in multi-user mode. In addition to the improperly configured multi-user setup, several other factors can also promote the QuickBooks error 6000, -82, or 6000, -106. To resolve the error, you need to dig deeper into the possible reasons behind the error.

What Are The Possible Reasons Behind QuickBooks Error Code 6000-82 or 6000-106? 

Error: 6000, 82 can take place due to several reasons. However, when you know the possible reasons, troubleshooting becomes an easier task. Below is the list:

  • The company file you are trying to open is damaged.
  • It is possible that the other computers in the network have a faulty company file.
  • A damaged data-name source can also be a possible reason behind the error.
  • Improperly installed QuickBooks software on the system.

How To Troubleshoot QuickBooks Error Message Code 6000-82 or 6000-106? 

To fix the error 6000 82 in QuickBooks Desktop, you need to check the possible reasons and fix them one after the other. Moreover, update QuickBooks to the latest release before proceeding further with the error resolution:

Solution 1: Make Sure That Company Name Is Correct

Damage in the data name source is one of the apparent reasons behind the QuickBooks error 600, -82 or 6000, -106. To fix it, check if the company file name is correct:

  • Launch QuickBooks and open the folder containing the QuickBooks company file.
  • Locate the company file in the folder and right-click on it.
  • Select Rename from the drop-down list and remove the special characters or spaces (if any).
  • Click Enter to save the changes.

After correcting the company file name, try to access your company file again. Move to the next solution if you can’t.

Solution 2: Disable Hosting On Every Computer in the Network

Disabling the hosting on every computer that has QuickBooks installed on them can help in the error resolution. To do so:

  • Go to the Utilities and locate the Stop Hosting Multi-User Access option.
  • Click Yes when you are prompted to confirm the disabling of multi-user access.
  • Again, click Yes to confirm that the company file is not open.
  • If you are getting this issue in the multi-user environment, it is possible that the computers in the network have a partial or damaged installed program. In such a case, you need to fix all computers one by one.
  • Go to the Utilities and check the option it is showing.
  • If it says – Host Multi-User Access, it means hosting is disabled on these machines.
  • If it prompts – Stop Hosting Multi-User Access, it means the hosting is enabled, and you need to turn it off.

Now that you have disabled the hosting try to open the file you were getting an error with. If the error still persists, contact QuickBooks customer service or try the next solution.

Solution 3: Host Local and Remote Files

Enabling the multi-user access correctly can troubleshoot the QuickBooks error 6000 82. Perform the below-given steps:

  • Open QuickBooks and then press the F2 key. It will open the product information window on your screen.
  • Next, in the Local Server Information window, you need to change the hosting to Local Files Only.
  • After that, switch to Multiple User mode to open the company file on the server computer.
  • Now open the company file on the server.
  • Press the F2 key again to see a product information window.

Hosting is now set to the local files only. Now check if the QuickBooks error 6000, -82 or 6000, 106 is fixed or not.

Related Article: How To Import Transaction In QuickBooks Online

Summary! 

The solutions discussed in this post help users in troubleshooting the QuickBooks error 6000 82. However, not all users are comfortable with this extended error-resolution process. All the users who want to get rid of this company file access error can connect with our QuickBooks QuickBooks customer service to get immediate technical assistance.

Recover QuickBooks Admin Password

QuickBooks is a cutting-edge accounting tool that helps small to mid-sized businesses store, manage, and share crucial financial data. The password-protected accounts in QuickBooks ensure the utmost safety of your financial files. Moreover, you can share the company file and grant them different levels of password-protected access permissions. However, we deal with numerable passwords in our day to day life, and it is common to lose your passwords for a number of possible reasons. Fret not! You can recover the QuickBooks admin password with a few simple steps described in this post.

Intuit’s Simple Admin Password Reset Procedures  | How to Recover or Reset

Resetting admin password can be a demanding task if you don’t know the exact resetting process. However, there are two main procedures to recover the lost admin password in QuickBooks: Manually and by using QuickBooks Password Reset Tool.

1: Recover QuickBooks Admin Password Manually (2022 or Newer Versions)

Before you proceed further to reset the password in QuickBooks Desktop manually, you need to check the type of account you are performing the steps for. In QuickBooks, there is an admin password and a user’s password. First of all, you have to determine the type of password and then you can perform the steps for a manual admin password reset.

Recover QuickBooks Admin Password

Step 1: Determine the Type of Password 

There is a crucial difference between changing the admin password and the same for a user’s password. It gets perplexing for the users in most cases. To check, you need to consider the below-given points:

  • If you enter only the password during the sign-up process.
  • When the user name is Admin or the name you have created for the admin.
  • If you are a user, then the admin is authorized to change your password.

Step 2: Reset QuickBooks Admin Password

Now that you know that the password type is manual, you can perform the below-given steps to recover QuickBooks admin password:

  • Launch QuickBooks and go to the login window of the program.
  • In the same window, you have to click “I forgot my password”.
  • Now you have to choose an email address from the drop-down list and hit Next.
  • By entering the email address, you can receive a token on it, which can help you reset the admin password.
  • Enter the token in the specified area and set a new password for the QuickBooks Admin account.

Determine the Type of Password

Note: If you are not able to locate the token’s email, then you also need to check your spam folder.

If you don’t see our email address in the drop-down list, choose the “Don’t see your email in the above list?” option. Follow the on-screen instructions to get the job done.

2: Manually Resetting QuickBooks Password for 2021 or Older Versions

Reset Admin Password | Tips and other Reminders

If you are using QuickBooks Desktop 2021 or an older version, then you need to perform the below-given steps to recover QuickBooks admin password:

  • In the QuickBooks Desktop login window, click “I forgot my password”.
  • Now enter the below-listed information in the form:
  • Enter license number and your QuickBooks version. (For license number, press F@ in the login window).
  • Enter the name, phone number, email address, and ZIP code.

Reset User Password

Note: The information should be the same that was provided at the time of product purchasing. You can get this information by logging into your Customer Account Management Portal (CAMPS).

  • Once all the information is given click OK. If the provided information matches, you will get the password recovery code on your primarily listed email address (in the spam folder).
  • Now QuickBooks will guide you in resetting your admin password.

Reset User Password | Recover QuickBooks Password | QuickBooks Desktop Administrator

If you want to recover the QuickBooks user password, follow the below-demonstrated steps:

  • Launch QuickBooks Desktop application and sign in with admin login credentials.
  • Now go to the Company and then choose the Set Up Users Passwords option.
  • Next, select Set Up Users.
  • Enter the admin password if prompted.
  • Now from within the User List, choose the user for which you need to reset the QuickBooks password.
  • Moving ahead, choose Edit User, click Next, and choose Finish to end this process.

QuickBooks Admin Password Recovery

If you are having trouble resetting the user’s password by this method, make sure that the information you have provided is exactly matching to that in CAMPS. If you are still having any technical unease in performing the steps, use the Automated Password Reset Tool for QuickBooks.

3: Utilize Automated Password Reset Tool for QuickBooks Admin Password Recovery

The next method is to use Intuit’s QuickBooks Password Recovery Tool. Below are the steps:

  • Visit Intuit’s official website and download QuickBooks Password Reset Tool.
  • Next, go to the Download folder and then double-click on the QuickBooks Auto Data Recovery utility.
  • Moving ahead hit Browse and then choose the locked company file.
  • Now click Next and then sign in to the account liked to the QuickBooks.
  • You will now receive a security code from Intuit.
  • Enter the security code correctly in the password reset window.
  • After that, create a strong password to protect your QuickBooks company file and click Next.
  • Wait for the password reset tool to complete its task.
  • Once done, open the QuickBooks company file and try to log in it with the new password.
  • Click OK, and use this password for opening your company file.

Resetting QuickBooks Admin Password

Things to Keep In Mind When Resetting QuickBooks Admin Password

The security of your financial data is very important and using a strong password can help you protect it. However, when choosing your password, you need to consider the below-given points:

  • Use a strong password; a strong password is a combination of alphabets, numbers, and special characters. Moreover, you can change the case of the alphabet to make it stronger.
  • A good password is easy to remember, but difficult to crack.
  • Don’t use any social information in the password, such as mobile number, partner’s name or others.
  • Prevent your password from side peeping and people with nefarious intentions. Don’t share until fully confident.
  • Don’t use the same password or a password pattern for different online accounts.
  • Changing your password periodically is good for your QuickBooks company files.

QuickBooks admin password


Related Article: How To Fix QuickBooks Error The File Exists?

Final Words!

The handy steps described in this post can help you in resetting your QuickBooks admin password via manual and automated procedures. Choose your password carefully as it is crucial for the security of your financial data. For any technical assistance or help on QuickBooks admin password reset, feel free to dial our QuickBooks helpline number. We are just a call away!

Troubleshoot and Diagnose Firefox problems

Mozilla Firefox is a premier browser used by multiple users worldwide to navigate various websites, images, gifs, etc. Most problems with Firefox can be removed by going through the troubleshooting steps explained in this blog. If one doesn’t work, go with the next one. Sometimes, users may face errors while accessing the Firefox problem. To remove this problem quickly, you must dial the Firefox helpline number to get accurate solutions. Various procedures to diagnose and fix problems are given in this write-up. You can make use of these troubleshooting steps to remove.

Repairing Procedure to Fix Firefox Issues

Some troubleshooting steps are given below to fix Firefox errors.

  1. Resume Your System

Sometimes errors can be removed by simply shutting down the computer and starting it once again.

  1. Delete your cache or cookies

Various errors with the loading page can be rectified by deleting the Firefox cache and cookies. Press on the menu button to access the menu panel. Tap History and choose clear recent History. Choose the Everything option in the Time Range drop-down to clear the message. Select both cache and cookies below the drop-down menuConfirm that other items you wish to have are not selected. Tap Ok

  1. Restart Firefox in a Troubleshooting Manner

Firefox’s rectification mode deactivates extensions, utilizes the default themes, switches off hardware acceleration, and utilizes default toolbar settings, among other changes. To begin Firefox in troubleshoot mode,

  • In the next open Firefox, in troubleshoot dialog, tap open
  • Examine whether your error is still happening in troubleshoot mode
  • If the error still happens in Troubleshoot mode, move to the next step
  • If the error doesn’t happen in troubleshoot mode, go through these instructions to fix extensions, themes, and hardware acceleration.
  1. Re-establish Firefox

The error causes a few Firefox errors with one of the program files. Go through these methods completely to delete and reinstall Firefox. These steps won’t delete your Firefox profile data as details are saved in a separate location.

  • Save and download the installer for the official version of Firefox
  • Tap Firefox menu and select Exit
  • There may be leftover files and folders once you uninstall Firefox that must be deleted for a clean installation
  • Remove Firefox from your system
  • Remove the Firefox program folder, found in one of these locations by default – C:\Program Files\Mozilla Firefox or C:\Program Files(x86)\Mozilla Firefox
  • Re-establish Firefox earlier using the installer.

The Refresh Firefox feature can troubleshoot many problems by restoring the Firefox profile to its default state while saving your essential information.

  • Tap the menu button, tap Help, and choose more troubleshooting information.
  • Press Refresh Firefox, then Refresh Firefox in the confirmation window to access. Firefox will shut to refresh itself
  • Once completed, a window will list your imported details. Tap the Finish button. Firefox will access it
  • Please choose whether you want Firefox to regain some windows and tabs or all and press the Let’s go button.
  1. Make A New Firefox Profile

Sometimes, files in a Firefox profile folder correspond to important details that a Firefox doesn’t delete may cause the error. Make a new additional profile that won’t contain any of your old Firefox data.

Once you follow the above-discussed diagnosis procedures, you can easily find out and troubleshoot Firefox errors. If you fail to remove Firefox hangs or do not respond error, you must dial the Firefox customer service number to get some accurate tips.

Firefox Not Working After Windows 10 Update 2021

Mozilla Firefox is a premier browser that allows you to experience high-speed internet browsing and downloading. A time once you face some error, upgrade the browser. It occurs because of any technical glitch installing the corrupted upgrade.

Sometimes incomplete installation may create browser errors. It occurs when you are upgrading the browser. You can resolve Firefox not working after Windows 10 update error. If you can rectify them, you must call the Firefox helpline number to troubleshoot and get appropriate tips.

Troubleshooting Steps to Repair Firefox Not Working After Windows 10 Update 2021

Some repairing procedures are detailed below to rectify Firefox not working after Windows 10 update 2021.

  • After installation of Firefox, it works well on your computer. Open the window and observe updates for Firefox. If it is present, Firefox will install and download it immediately.
  • When the upgrade process is completed, tap on the Restart to upgrade Firefox button to finish up the process. Delete Firefox cache and data available on Firefox.
  • Once your internet browser fails to act but won’t respond after the system upgrade, upgrading the browser is an excellent method to rectify this error. Directly upgrade browsers from browser settings. Try to uninstall the not working browser, download, and install the current system version.
  • This problem occurs because browser plug-ins like McAfee WebAdvisor get deactivated when you upgrade the browser. This feature gets unavailable. The menu loads but is not usable. It’s the new name for Site Advisor. For more information about WebAdvisor, it’s missing after you update McAfee WebAdvisor. But, it’s not available in the new Firefox 79 update.

Find Related Error: Fix Slowness Crashing Error Messages And Other Problems

Firefox occurs because of faulty extensions, themes, inaccurate settings, and files. Once you follow the above troubleshooting methods, you can rectify them easily. If you can’t fix Firefox not working after Windows 10 update 2021, you must dial the Firefox customer service number to get some accurate suggestions. Mozilla experts are fully-trained, well-qualified, and capable of resolving any issue in Firefox. You can connect with them via call, chat, or email to discuss your issues. Once you connect with them, clearly explain your queries regarding Firefox to Mozilla technical team, and they will assist you will finding every possible way.

Firefox Won’t Open? Go Through These Troubleshooting Methods

After Firefox October 2020 Update, various users have complained about some specific issues after the installation. In the Microsoft Community forum, users have been told that Firefox, after the Windows 10 update, tries to restrict Chrome, Edge, Firefox, and other browsers. To update windows 10, tap on Documents. Store your bookmarks in your HTML file. Firefox must prepare the file. Every time you upgrade your bookmarks, you store them by overwriting this file. If you activate this task consistently, you will further get the most updated bookmarks. Google has also decided to resume the release of the update program of Google and Google Chrome. It will release the M83 version three weeks earlier than previously. A Firefox has pushed its new version release of 66.0.4 Android and Desktop and version of 60.6.2 for ESR.

  • The new update completely attaches to your browsers other than restoring your system. Fortunately, Explorer worked, but Google Chrome can’t uninstall and reinstall it
  • The recent news and developments on Firefox and Mozilla demonstrated a global non-profit that promotes opportunity, innovation, and openness. Tap J to move to the feed. Tap the question mark to learn the rest of the keyboard shortcut.
  • Uninstall the outdated version of Firefox creating problems and then reinstalling it. The KIS URL Advision symbols appear when it performs Google Search using Firefox, but it doesn’t appear at the top of Firefox where the Adblocker is available.

The above-discussed troubleshooting steps will allow repairing Firefox won’t open error. If you can’t rectify them, you must take expert guidance by connecting with the Mozilla customer support team. You will get appropriate tips to repair Firefox won’t open error quickly.

iPhone AOL Account Error No Password

When users are trying to access an AOL email account on iPhone, they will be getting AOL not working error. AOL mail is configured well, but iPhone can’t recover or show any email from AOL. The message will be displayed on your screen, “can’t get an email. No password is found for emailaddress@aol.com, and move ahead to mail account settings and type password”. It means that re-typing the password, eliminating the AOL account, and reading it doesn’t troubleshoot your problem. The main problem with an AOL account is that you can’t access your AOL mail. You seem frustrated when you get an error message no password provided for your AOL mail account. To repair it quickly, you must dial the AOL customer service number to get some appropriate tips.

Related Article : Migrate Verizon Email to AOL

How to Fix “No Password Provided” Email Error on iPhone

Various causes are behind AOL account error showing no password on iPhone. Let’s go through some of these factors to rectify the AOL account error showing no password error on iPhone.

  • An outdated version can’t be configured properly
  • A third-party application can also bring this error
  • Usage of the old password
  • Weak internet issue
  • Added Wrong server settings on iPhone

The above-discussed factors can assist you in troubleshooting this AOL account with no password error on your iPhone.

Troubleshooting Procedures to Fix iPhone email “No Password Provided” Error 

iPhone AOL Account Error No Password
  1. App-Specific Password

AOL app now requires an app-specific password to be entered instead of normal passwords. Now, you need to generate and use an app password to access AOL mail from these apps. To proceed with it, you must activate two-step verification for your AOL account.

  1. Move to AOL Account Security Page and Log in

Perform AOL by logging in to AOL from a system.

  • Press generate app password or manage app passwords
  • Select your app from the drop-down menu, and press generate
  • Go through the instructions below the password. Type your app password without spaces
  • Tap Done
  • Utilize this app password and email address to log in to your email app.
  1. Eliminate and Re-add the AOL Account

You might have removed your AOL account by moving to Settings, Mail, Accounts, AOL, and Delete Accounts. Then, reattach it by moving ahead Settings, Mail, Accounts, Add Account, and examine AOL account on iPhone. Hopefully, this will get fixed.

  1. Upgrade iPhone to the latest iOS

Suppose you can’t access AOL mails on your iPhone, then try to upgrade to the recent iOS version to troubleshoot any software glitch.

The above methods will assist you in repairing Fix sign in problem in AOL mail. Suppose you can’t remove this problem; you must dial the AOL email helpline number to get appropriate tips. AOL email help desk team is available to assist you 24/7 to eliminate this problem.

iPhone AOL Account Error No Password

Fix Mac Mail AOL Authentication Failed issue

Recently, email has become the basic necessity to complete various essential tasks and register on different online services. Various industries are offering email services to their users, and millions of users now recommend them. AOL is a premier web-based email service that offers some excellent services and features to its users. The adherence of technology on email service is implemented in various patterns to avoid errors in AOL email. However, it was analyzed that users are facing AOL authentication errors. This error takes place when the email server fails to respond quickly. In a few situations, the factors behind this problem are the wrong entered password, username, or weak server connectivity. Despite these factors, one can resolve the AOL Authentication Failed error by going through some troubleshooting steps given in this write-up. If these rectifying procedures don’t work for you,  call the AOL customer service number to migrate verizon email to AOL with appropriate tips.

How To Fix AOL Authentication Error | Failed | On MAC | Android

Suppose you have access to the AOL app, you will receive pop-ups. It can be the primary factor and gather all emails in a single place. Customers can’t access AOL email through an application or browser. Various problems are associated with the opening and performance of AOL email and how to troubleshoot them.

  • The first factor behind AOL email can be the inappropriate username and password.
Fix Mac Mail AOL Authentication Failed Issue
  • Sometimes users enter inappropriate login credentials. To resolve Authentication Failed and can’t Sign-in error, right login details should be filled-up
Fix Mac Mail AOL Authentication Failed Issue
  • Resume the Mac to resolve the access issue on email. It can be due to inappropriate details. You must resend and recreate the messages to troubleshoot the AOL email not working on Mac to resolve this problem.
  • The third factor can be the incorrect configuration settings of AOL email. These settings are associated with incoming and outgoing emails
Fix Mac Mail AOL Authentication Failed Issue
  • The fourth factor behind AOL stopping responding is once you move your email to another Mac. To resolve this error, observe some rules and move ahead according to the guidelines.

Some above points assist you in rectifying AOL email. If you can’t get proper solutions, you must call the AOL helpline number to get appropriate tips.

Troubleshooting Procedures to Rectify AOL Authentication Email

Upgrade browser settings quickly to troubleshoot AOL authentication errors. Go through the troubleshooting steps mentioned in this write-up.

  • Troubleshoot authentication problems with AOL mail; the user must amplify the browser settings
  • Establish a specialized set of a particular browser, delete unwanted files and browsing history
  • Once the data is deleted, the user can examine if they can troubleshoot authentication errors.

AOL Mail: “Unable to verify account name or password”, Fix

Some other troubleshooting steps are given below to fix AOL email accessing failed error.

  • Alternatively, upgrade bookmark saved on your browser
  • Suppose rectifying procedures get failed, the user can fix the browser and then try to access AOL email.
  • Users can try to activate AOL mail with no add-ons by choosing the specified option in the System tools of the specified browser
  • Users can enable secure mode on their browser and inspect if they can troubleshoot AOL authenticate errors.

To resolve AOL not working error, you must call the AOL email helpline number. They will provide you with some appropriate tips to rectify when Cant open an attachment in AOL mail to AOL mail by users.

Firefox Won’t Start Find Solutions

If Firefox hangs, it suddenly stops responding to your clicks and keystrokes. Even mouse won’t work and seems like a spinning wheel but not responding issues is highlighted in the title bar. Some troubleshooting procedures are listed below when Mozilla Firefox Not Loading Pages at all.

Methods to Resolve Firefox Not Working Issue

  1. Resume Firefox to Its Default State

A refreshing feature can troubleshoot various errors by backing Firefox to its default state while saving your crucial details. If you prefer to use it before moving to other lengthy troubleshooting procedures.

  • Press the menu button, tap Help, and choose More Troubleshooting information
  • Press refresh Firefox, then refresh Mozilla in the confirmation window that opens. Then, Firefox shut down to refresh itself
  • Once finished, a window will enlist your imported information. Press the Finish button, and then Firefox will get accessed.
  • Choose if you are willing to restore some windows and tabs and then press the Let’s go button

The above points will assist in refreshing your Mozilla Firefox, and it can resolve Firefox not working error.

  1. Avoid Firefox Crashes

Go through some steps to avoid Firefox crashing quickly.

  • Upgrade your software
  • Examine spyware or viruses
  • Fix your crash
  1. Unable to Read Configuration File

This problem is caused due to Firefox program files error. Remove the Firefox program and then reinstall it. It won’t delete your bookmarks, passwords, or other user data and settings stored in a separate folder.

  • Eliminate Firefox
  • Remove the Firefox installation directory, find each one of them available in these locations. C:\Program Files\Mozilla Firefox 2. C:\Program Files (x86)\Mozilla Firefox
  • Utilize another browser to establish Firefox installer from the Firefox download page and install it.
  1. Errors while accessing the file for writing

Once you get this problem to establish Firefox on a windows system, choose Firefox to sign-in as Administrator. Refresh the computer if you have an Admin account, execute the program as an administrator.

  • Get the Firefox.exe program file in the Firefox application folder on your system
  • Do a right-click on the icon
  • Choose the following user option. From the user drop-down menu, choose Administrator who has administrator privileges. Type the password required to sign-in to this account. Press Ok
  • Firefox application will start using the Administrator windows account. The user that begins to sign-in to Windows at the start-up is still active.
  1. Firefox Slows Down

Firefox slowdowns can occur due to various reasons. Few steps are given to eliminate it.

  • Upgrade Firefox
  • Upgrade your video drivers
  • Firefox stops responding
  • Optimize windows
  • Inspect if you have malware in your system
  • Block unnecessary content
  • Utilization of High Hardware Resource

Suppose Firefox doesn’t open; you must dial the Mozilla Firefox customer support number to get some appropriate tips. After going through the above troubleshooting methods, you can rectify this problem. Mozilla technical experts are fully-trained and experienced in handling Firefox errors. Mozilla technical center is available 24/7 to contact you.

AOL Mail Not Working On MacBook Pro

AOL Email is one of the prominent email services for sending and receiving various emails. It is now merged with Yahoo email. You can sign in to your AOL email by visiting the AOL login page. Sometimes you may face AOL email not working on MacBook Pro. Users try to find reasons behind this problem. Once you obtain them, you can troubleshoot this issue. If you can’t resolve this problem, you must dial the AOL helpline number to fix AOL mail not working on iPhone. AOL technical experts are available to resolve this problem. Most of the problems in AOL email are related to not receiving and sending emails. Everything you need is to fix both incoming and outgoing emails.

How to Resolve Receiving AOL Email on MacBook Pro?

One of the primary reasons behind AOL email not working on Mac can be the wrong email address and password entry. Few troubleshooting steps to fix receiving AOL email on MacBook Pro.

  • Establish AOL email on your MacBook Pro, move to the email menu, and press on the Preferences option
  • Access account tab and press on AOL email account in this window
  • Examine on Account Information and examine any wrong typing of your email address. So, press on the email address drop-down arrow and select the edit option
  • Do a double-press on your complete name, edit all the wrong entered information, and then press on OK
  • Edit the wrong entered password, establish a tab of your system preferences
  • Press on the Internet Preferences and select AOL entry in the tab
  • Type your appropriate email address and password and press on details
  • If required, amend the username and password for your email address.

How to Troubleshoot Sending AOL Email on MacBook Pro?

AOL not working on Mac can occur due to an inappropriate synced SMTP server. Inspect it after following these easy steps.

  • Press on the main menu and choose the option Preferences
  • Press on the accounts tab option and tap on the AOL email
  • Search server settings and then press on it
  • Amend it to the AOL email server at the outgoing AOL mail menu
  • Press on Edit SMTP server list to inspect these server settings by using a menu
  • Examine the outgoing AOL email servers list and obtain AOL email entry and confirm that all settings are appropriate or require any correction

After following the above points, you should check email settings to get multiple information at your email account during resolving. Go through some troubleshooting methods listed below.

  • IMAP server – imap.aol.com

AOL Login

  • IMAP user name – your computer screen name

AOL Email Login

  • IMAP password – your AOL email password

AOL Agree

  • IMAP port – 993
  • IMAP TLS/SSL – configure it if required
  • SMTP server address – smtp.aol.com
  • SMTP user name – AOL screen name
  • SMTP password – your AOL email password

AOL Option

  • SMTP port – 587
  • SMTP SLS/TLS – Required

Once you follow the above troubleshooting methods, you can resolve this method immediately. You can fix AOL email login problems quickly after getting some appropriate tips to resolve this problem instantly. AOL technical team is capable, well-qualified, and professional to handle multiple problems in AOL email. You can approach to AOL help desk team through live help, email or call. AOL team is ready to handle all your issues round the clock.

Cancel AOL Email Account and Save the Emails

Do you want to Cancel your AOL Email Account and Save the Emails as well? If yes, then follow this blog and find a step-by-step guide to do it. We all must have heard the name AOL once in our life. Many of us are AOL Email users as well, but sometimes, people have to delete their AOL Account, and they don’t know the exact steps to do it.

For immediate help, you can call us toll-free number and get in touch with an AOL expert.

Why do People Delete their AOL Email Accounts?

At times users want to delete their AOL email account because they found some other email service provider who is providing better service by paying less charge or no charge. Apart from that, many people choose to do so due to hacking or some other issues as well.

How to Delete an AOL Email Account?

You can follow the given steps to cancel your AOL Email Account effortlessly:

1. The first that you have to do is cancel your active subscriptions and pay the account balance.

If you have chosen paid plan to get the active subscription to your AOL Email, then you have to wait for at least 90 days once you cancel the plan and decide to delete your AOL email account.
We know that this policy is a bit inappropriate for a few people, but it is important to prevent fraud activity and make the AOL Platform a safer place.

2. Save your Email history in some other account before heading to delete an AOL Email Account.

We always ask you to save your older AOL email to another email account. This will help you in making sure that you won’t lose any kind of important data or information.
To do this, users don’t need any specific kind of desktop; you can do it on any device using the browser.
In case you don’t want to ignore any manual work and save your folder organization, you can try different apps that can help users in completing such a process. These services are paid, but the feature of migration of emails into any other email service platform, like Outlook, Yahoo, Gmail etc., is properly designed.

3. Change your AOL Email Address with some other Active Email Address on all the platforms that are accessed using it.

Always remember to make sure that none of your online accounts are still connect with the old AOL Address when you decide to delete it.

4. Inform others that your AOL Email Id is going to be Delete.

Once you request to close your AOL account, it will be deleted permanently. But the process is not instant; firstly, AOL will deactivate your Account for the initial 30 days. If, in these 30 days, you signed in to your Account, then your Account will not be deleted. Thus make sure not to use AOL email in these 30 days.

Note: The 30 days deadline can differ according to country.

Important: Your Account will continue receiving emails or messages in this deactivation period as well. So, set an auto-reply for everyone, where you inform them about the account cancelation before deleting the email.

5. Instructions to Cancel AOL Email Account

  • Launch your browser and head to the AOL Account Terminating Page.
  • Now, login to your Account by providing the login details, i.e., Your AOL Email address.
  • Thereon, select Next and provide the AOL Password as well.
  • Next, choose the Sign in tab, and choose the Continue Delete my Account button.

Note: This button is present at the bottom of the page. It is red in color.

  • Provide your email address again, and choose the Text box in the middle of the page.
  • Enter your Full Account’s address, and select Yes, Terminate This Account section.

Note: This button is Blue in Color.

  • Finally, tap on Got it option, and this will show that your AOL account is deactivated now. Now, just wait for 30 days, for complete deletion process.

Note: Suppose you have different usernames connected with your AOL accounts; they all must have been deleted separately. Once all the additional username is deleted, now the AOL server will take almost 30 days to delete your Primary Username.

After completing the overall process, you now have to wait for 30 days, but if in between these 30 days, you log in to your AOL email even by mistake, then this can be a problem. Your account will be  activated. Now, you have to do the same process to Cancel your AOL Email Account after waiting for at least 15 days.

Wrapping up the Things!

We know that all your data are really important to you, and that is why we have provided this blog explaining the process to Cancel your AOL Email Account and Save Emails easily. Unfortunately, if you still get stuck in between and need experts’ advice, you can get in touch with our AOL Email experts by dialing the toll-free number or using the live chat option. The live chat option is present at the side of your screen as a Help button; click on it and provide the required information. That’s it; our professionals will then join you to provide you with a solution to the problem.

How to Migrate Verizon Email to AOL?

Verizon email was one of the most popular and well-favored email providers back then. But the platform decided to discontinue its services for the user. Verizon sold its equity to AOL and Yahoo. Besides these two, the stakes are also given to different other companies, but in less amounts. So after all this, the users of the email need to Migrate Verizon Email to AOL. But do you know how to do it? Let’s learn about it in this blog.

To grab an effortless way for Verizon Email Move to AOL, Call on our toll-free number and get help from AOL experts.

How can you Migrate Verizon Email to AOL easily?

If a user doesn’t want to do the manual process to migrate their Version email to AOL, they can use the Recovery Tools Email Backup software. The app is used by users to move emails from Verizon to AOL. This software gives a direct way to transfer the email. To utilize this, users have to provide the login credentials of their account only, and that’s it; the rest process will be very handy.
The software is paid, but users also have a free trial version of it. In the free trial, the Tool will allow the import of only the top 25 messages from Verizon to AOL. The steps to use the software are given below:

  • In the beginning, open the software and enter the Verizon.net Credentials.
  • Select the required mailbox folder items, and choose IMAP.
  • Now, you have to set up Verizon.net to AOL migration options.
  • At Last, hit the Back option to initiate the process.

Now, let’s go ahead and learn how you can migrate Verizon.net to AOL Mail Account.

How to Migrate Verizon Email to AOL?

If you want Verizon Move to AOL Mail, check the mentioned steps:

  • To start the process, open the software on your Windows device.
  • Thereon, select, choose your preferred Verizon Mail Provider.
  1. Verizon Mail (For AOL Users)
  2. Verizon Mail (For Yahoo Users)

Note: This process helps the users in dual ways to load important data. This can give you a way to migrate multiple Verizon Accounts at the same time.

  • Select Batch Mode, and the software lets the account get connected With Proxy Server.
  • Now, in the User Interface, provide the Verizon email account login credentials.
  • From the list of folders, choose the important email folders that you want to migrate from Verizon to AOL Email.
  • Select IMAP Format from a different list of saving options.
  • In the Panel that says Save messages in the default folder, set up the Verizon.Net migration to AOL Mail option.
  • Utilize the advanced mode or edit the language section.
  • Write down the AOL Credentials in the required field.
  • Lastly, choose the Backup option to start the process of Migration.

How can you log in to AOL Verizon Email Login?

Check the steps given to log in to your AOL Verizon Email Account:

  1. To initiate the process, launch the Browser first and then head to the given URL https://help.aol.com/products/aol-mail-verizon.
  2. Move ahead by clicking on the Check Your Mail option. This will take you to the login Page.
  3. Now, enter your Email address, username, and phone number that are linked to your AOL email.
  4. Once you are done with this, select Next, and enter your Account Password.
  5. Finally, choose Next to connect your Verizon email to AOL Account.

Summing it Up!

Data or information is very important for all users. We hope this blog helps you to Migrate Verizon Email to AOL. However, if you still end up with any difficulty while completing the process, feel free to get help from our AOL experts. These experts are available around the clock to help AOL users. You can either email us your Queries or choose the live chat option. To go with live chat, you have to find the Help option present at the corner of this page. Thereon provide the required details and hit submit. After that, an AOL representative will help you in fixing the error you are facing. If the representative isn’t able to resolve the problem on call, they will arrange a clock for you at your Convenience.