Fix Error messages of HTTP and know about them thoroughly as they are your real buddies. Believe it or not, as unwanted as they might be, they surely prove to be helpful as they indicate the reason behind such error codes. There are ample number of error messages that you may encounter while you connect to the internet. There could be more than one reason for an HTTP error code. In this blog, we are going to discuss what the HTTP codes are, what are some of the commonly error codes and how can you fix them.
What Exactly are Fix Error messages of HTTP Codes?
Fix Error Messages of HTTP codes are basically the responses issues from the client’s request to the server. For instance, when the web browser tries to connect to the WordPress site, the web browser which is the client is making request to the server which is the WordPress site. Basis how the request sort, the server side shows multiple responses. Redirects, server errors, client errors are such responses. HTTP error codes do not form part of the web pages, they are server responses to how the request is sort.
Dial Toll Free Number : +1-855-356-3099
HTTP error codes are helpful in figuring out what the problem is:
Now that you know what an HTTP error code is, let’s dig into some of the commonly encountered error codes and also understand how these can be resolved.
-
400 bad request error
If you are trying to access a web page that is not open to the general public or if you fill in the incorrect URL, then you might see a 400 bad request error in your web browser. To fix this particular error, you should make sure that you are typing the correct URL. If still the error persists, you might want to use a search engine like Google to find the page which will more often than not, lead you to the right URL.
-
Network Connection Refused Error
The network connection refused error occurs in three cases. When the website is experiencing loads of unexpected traffic, when it is under maintenance or when it is only accessible by registered users. This particular error usually requires no fixing as this generally is a temporary problem.
You just need to wait for a few minutes or try refreshing the page. It also will make sense to ensure that you have put the accurate url. Although a far stretch, you might want to use VPN and try accessing the page. This could help in cases where the connection is being refused because of your location.
-
Unable to locate host error
This particular message can appear in several situations such as: the website being unable to connect with the host server (this could be because of maintenance or bandwidth issues), the network connection has been either lost or impeded, the URL is incorrect. Generally speaking, this error is usually temporary. You need to check the URL for mistakes. Also, try again to contact the server by hitting the refresh button. You must also check the physical network connections to make sure that they are properly attached.
-
Host Unavailable Error
The error message Host Unavailable is displayed when the site is unable to connect with the server. The reasons for this could be high unexpected traffic, website maintenance or the site being taken down. Unlike some online error messages, this particular error is not a permanent one. Refresh the page to try accessing the website again, clear your cookies or just wait for some time and try again later.

-
401 Unauthorized error
401 unauthorized error message means that the server received an unauthenticated request at its end. This message displays that the page couldn’t load because of invalid credentials for whatever reason it might be. It is possible that the login URL has changed or the entered URL is incorrect. If this is not the case, you need to try clearing the browser cache and cookies.
-
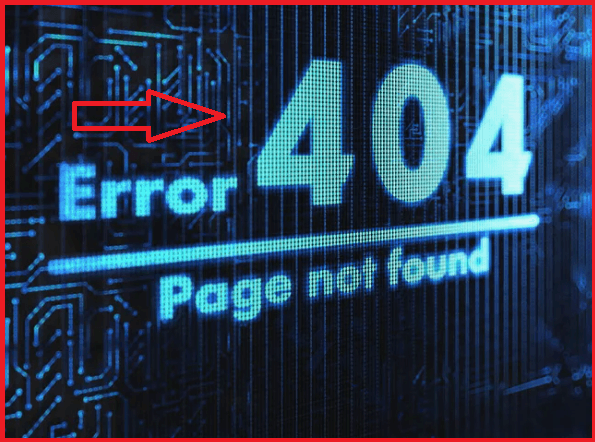
404 Page Not Found Error
It is possibly the most common error code on the internet. This particular HTTP response is generated when the page that the user is looking for cannot be found on the server. There could be a host of reasons responsible for this particular error code. It could occur because the Webmaster has deleted the page or the entered URL is incorrect. Fixing a broken link is basically an essential maintenance task. One way of doing this is by installing the redirection plugin from the WordPress directory. This can then be redirected to any webpage on the site.
-
500 Internal Server Error
There are some generic errors that are displayable when something is wrong with the server. Since, it is a generic error message, there are a number of different causes including issues related to WordPress plugins, PHP issues, database problems and much more. Fixing the 500 Internal Server is a bit tedious as there are multiple reasons to blame for its occurrence.
-
502 Bad Gateway Error
HTTP error code is different from other error codes. This particular HTTP error occurs when one server on the internet receives an invalid response from the other server. The 502 bad gateway error is displayable on the screen when the server takes more time than the expected to complete the request.
This is fixable by generally refreshing the browser, clearing the browser cache etc. If you have just moved to the site, try waiting for at least 24 to 48 hours. You can even go to the hosting provider to check with them. Sometimes, a third-party CDN service or WordPress plugin could be causing the servers to give out this 502 bad gateway error. If the solutions provided above don’t work, try switching the WordPress theme to another.
-
503 Service Unavailable Error
You might be experiencing 503 Service Unavailable HTTP error because of multiple reasons. It is either because the internet connection issues, the site has been delete or moves or the site is experiencing great amounts of unexpected traffic and is temporarily down.
A quick fix for this particular error is checking the URL for issues (maybe you typed it wrong). Also try refreshing the webpage a few times and then rebooting your network hardware.
-
301 Moved Permanently Error
When a particular webpage is permanently available to a different URL location, the server throws error 301. Although it is not countable amongst the errors per se but still it does communicate important information. This can be on a page-level by pointing you on another similar post(or even homepage) or a domain level.
In order to ensure that the redirection happens without any problems, you need to check the redirect setup. Try switching it with redirection if you, in fact have used the WordPress plugin. If you have used the . Htaccess file to do the redirection, then you need to ensure that you did it correctly. You must keep the domain level redirection for a few months so that the Google knows that the resource is not available permanently.
-
302 Found Error
Although similar to the HTTP error code 301 in some ways, 302 Not Found error is a bit different in the sense that it is usable for the temporary redirection. This particular message response tells Google that the page not available temporarily and shall get back to its original URL at some point. It can redirect the user to another URL in moments if it is sort out correctly. One of the easiest ways of setting up a 302 redirect is by using the WordPress plugin. One can easily install and then use the Rank Math from the WordPress directory.
-
410 Gone Error
The 410 Gone error is eerily similar to the 404 response error. You may also think of it as a permanent 404 error. This code is usable when the webmaster decides to permanently remove a post or page forever or wants to republish it on another site. This particular response tells Google that the requests resource has been, in fact, permanently not available from the internet and shall by no means reappear, making it quite easier to get the page de-crawl or de-index from Google.
There are a host of reasons behind the “410 gone error”. Firstly, you need to check the input URL and ensure that is correct. Thereafter, you need to try debugging the update on the WordPress website. Also, you need to uninstall the WordPress plugins or third-party extensions, if any. If there is a problem at the server end, then none of these might work.
Conclusion:
- Now that you are aware of the various HTTP error codes and Fix Error Messages and how to sort them, it is time to apply this knowledge on your site and henceforth, improve your site’s user experience and the SEO. We have tried listing Fix Error Messages of Various HTTP error codes apart from the concept of what exactly are HTTP error codes.
- If you have any queries regarding these, you might want to contact us. We have an in-house team of proficient experts who are very knowledgeable with the functioning of codes and can resolve your queriers in moments. Feel free to get in touch with us through our website connecthelpline.com or shoot a mail at info@connecthelpline.com. We’d be happy to help!