All posts by admin

Stuck With AOL Error 212? Fix It Using These DIY Solutions

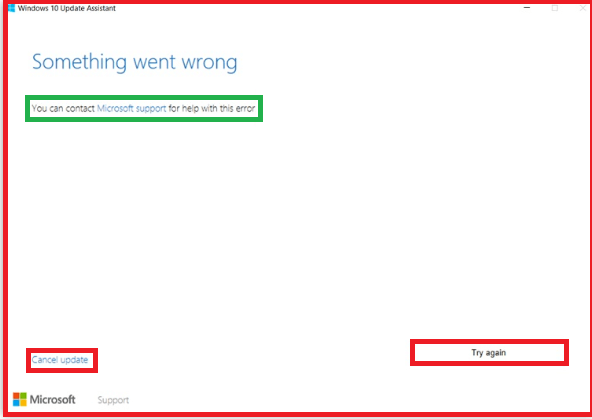
AOL Error 212 is the widely-used email service that provides top-notch emailing service to their providers. Despite serving various benefits, it is prominent in certain technical flaws. One of them is AOL  that usually appears while accessing the email service. Moreover, it may occur due to the corruption in the Windows Registry.

However, dealing with AOL Error Codes isn’t a difficult task until you follow the proper resolution to fix the issue. In this write-up, we have come up with all the root causes that may trigger the error and the solutions to fix them.  Finding it difficult to fix AOL Error 212 and need immediate help? Dial +1-855-356-3099 and get appropriate solutions to your query asap.

How to Recover Hacked AOL Email Account?

What Gives Rise To The AOL Error Code 212?

An inappropriate installation of the AOL email service is one of the major reasons behind AOL Error 212. However, there are several other factors that might be responsible for this issue. Go through all of these causes to get a better understanding about them.

  • Sometimes, it may appear due to corruption in the Windows Registry.
  • It may occur due to accidental deletion of the messenger files.
  • In other instances, the presence of malware or virus infection might obstruct users from accessing the email service.

Related Page: AOL Mail Not Working

How Can You Determine AOL Error 212?

In order to verify that you are receiving AOL Error Codes, you must look at the following signs and symptoms.

  • You might experience a sudden freezing, crashing or hanging of the system.
  • In some instances, users might discover that every time they try to run the AOL Mail it crashes.
  • Your operating system starts performing badly.
  • Every time the error displays on your computer screen, it comes along with an error message.

What Should You Do to Troubleshoot AOL Error Code 212?

Now, you have gathered sufficient information related to AOL Error 212, proceed further to the important section of this blog i.e, troubleshooting. Read the solutions given below properly and apply as per the causes of the problem to resolve the issue instantly.

Measure  1: Install the Runtime Libraries Again

Sometimes, the improper installation of the Runtime Libraries might create issues while accessing AOL email. Thus, it may lead to AOL Error Code 212. For that, you have to reinstall the libraries by accessing the following steps.

  • Initially, open the Control Panel and then hover your cursor over the Programs and Features option.
  • Now, you have to look for the Microsoft Visual C++ Redistributable Package.
  • After this, you must uninstall the package and relaunch your system.
  • Next, you must get the latest redistributable package. Then get it installed by following the instructions displayed on the screen.
Measure 2: Re-Establish the Graphic Driver

Sometimes, damage or corruption in the graphic driver might raise the AOL Error 212. Therefore, to resolve the issue you must install the graphic driver again on your device by following the steps instructed below.

  • Initially, move to the Device Manager section on your device and look for the graphic driver.
  • Right-click on the Graphic Driver and then choose the Uninstall option from the drop-down list.
  • Relaunch your computer device and look whether the issue is resolved or not.
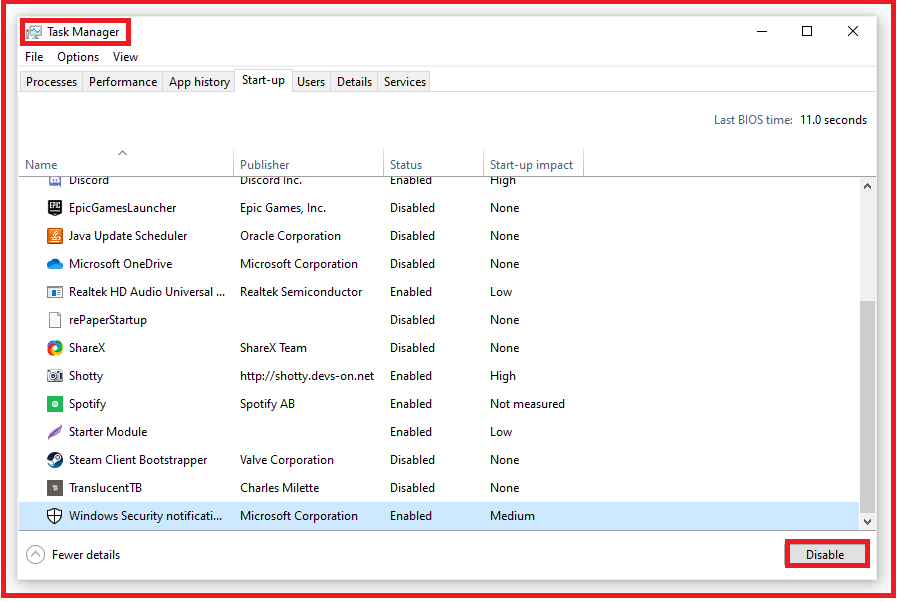
Measure 3: Shut Down the Programs Interrupting With AOL

There might be certain instances when the users might encounter AOL Error 212 when some programs are interrupting with AOL.

  • Initially, launch the Task Manager by hitting the Ctrl + Alt + Del keys simultaneously.
  • After this, you will get the lists of programs that are installed on the device.
  • Move to the Processes tab, highlight a running program and then hit the End Task option.
  • End the procedure by applying the same procedure from all the programs that are obstructing with AOL.
Measure 4: Free Up The Disk Space To Fix AOL Error 212

At times, users fail to run the AOL application due to lack of storage space on the disk. Therefore, to fix the issue you must implement the simple instructions given below.

  • Firstly, move to the Control Panel and choose the highlighted Administrative Tools option.
  • Following this, opt for the Disk-CleanUp option from the drop-down menu list.
  • From the drives list, you must choose the drive on which you have to perform the disk cleanup.
  • Now, pick all the files that you think are occupying the lot of space on your disk. Tap on OK and then choose the Delete files option.
  • Doing this, it will free up the disk space and then try to run the AOL email service to verify whether the issue is resolved.

Related Page: AOL Email Service Error

Final Thoughts!!

Dealing with the runtime error is a bit complicated task such as AOL Error 212. But, now by following the resolution methods explained in this guide you can gather all the relevant details required to troubleshoot the error. However, if you ever get stuck while implementing the solutions, then you must not worry. All you need to do is to get in touch with our highly-trained experts through the live chat facility to obtain quick fixes for the error. Alternatively, you may also send an email to our experts regarding your query and get proper instructions to figure it out.

How to Manage Spam Mails in AOL Account?

Finding it difficult to Manage Spam Mail in AOL Account? Well, this is a common issue today where users receive unwanted and unknown emails with malicious links from harmful websites. These spam emails are controllable by changing the privacy setting and spam filter in your AOL account. Here we will tell you how you could stop unwanted emails and Manage Spam and privacy in your AOL mail account.

Mailing is an important part of professional communication. However, receiving numerous Spam in your inbox, with some containing any virus and malware, could easily stop your AOL from receiving mail from other sources. This might heavily affect your working process. Thus it is really important to manage privacy in your account information regarding that is discussed below:

Why is it Important to Manage Spam Mails in AOL?

The primary reason, as discussed above, is that Spam consists of various attachments which might contain viruses, thus compromising your AOL account, and your working station is also affected by this. You can also Block Spam Emails on AOL Mail when you receive so many unnecessary emails.

 How to Block Spam Emails on AOL Mail?

There are many options available for different users to Stop spam mail in the AOL mail. This is done to save the user’s data and privacy from any kind of theft. Users can either block the sender directly when they receive the mail, or they also have the option to do so using the AOL account settings.

The blocking of such emails can be done by using both a Desktop and Browser, so you don’t have to panic about it. Further, to know more about different ways to Stop spam mail in AOL mail, you can check the below-given section:

Block Spam Mail Directly in AOL mail

Every user has their own preference to Manage Spam Mail in AOL Account. However, a majority of people prefer to do so using the Desktop. It is because this process is direct, short, and simple.

Manage Spam Mails in AOL

  1. Firstly, look for the mail which you want to block and tick the check box next to it.
  2. Now, you can see numerous options on your screen, including Delete, Mark as Important, etc.
  3. From all those options, select Mark as Spam.
  4. Next, you will get a prompt on your screen, where you have to click on Report as Spam button, and that’s it.

Related: Mac mail Authentication Failed

Add Unwanted Mails to your AOL Block List

If you want to add unwanted AOL emails to your block list, you can check the instructions given below:

  1. Begin the process by opening your AOL account.
  2. Thereafter head to Settings, and look for the Block Senders option.
  3. In the block list bar, you have to write the Mail Address that you want to block.
  4. Finally, select Save Settings button.

Create a White List and Block all Senders Except Contacts:

Whitelisting is a process in which a user adds an email to an approved sender list. This is done to make sure that the email from the sender never gets moved to the spam folder.

It is a simple process that has great benefits. Now, let’s understand how you can whitelist a contact:

  • First, log in to your AOL account and head to Mail Settings.
  • Thereon, choose the Block Sender.
  • Now, two options will appear on your screen; choose Block list.
  • Here you have to click on “Block all the Senders” except your own contact.
  • At last, hit the Save button.

How to Create a Contact List in AOL Mail?

  • Login to your AOL mail and click on Contacts present at the Left Panel.
  • Now, different options will appear on your screen, and from that, you have to click on New Contacts.
  • Lastly, provide all the contact details, and tap on Add Contacts.

Quick Steps to Update AOL Mail Filter Settings

Further, you can also make modifications in the AOL mail settings filter to control where you want to receive new emails. To do so, check the steps given below:

  1. Initially, launch the mail settings of your AOL account.
  2. Now choose the filter settings, and click on create a filter button.
  3. Input various parameters in your filters, like from where you want to receive emails and other things.
  4. Finally, click Save.

Blocking Spam mails in AOL Mobile App

Now, let’s understand how to stop spam mails in the AOL account.

  • To begin the process, open the AOL app.
  • Thereon, choose the Mailing Address that you want to block.
  • Finally, choose Mark as Spam, and you are done.
  • Do the same process for other emails as well.

 How to Block Images in AOL Email from an Unknown Sender?

Manage Spam Mails in AOL

Another form of Spam is unusual images which sometimes can be malicious or can harm your system while downloading. In order to block images from any spammer in AOL, read the given process below:

  1. Open the mail setting and select General Settings.
  2. In the reading section, select “Hide images in the mail from unknown senders”.
  3. Click Save settings.

How to Protect your AOL Mail from Spam?

  • Do not share your AOL mail everywhere
  • Keep away from unknown senders
  • Do not Allow sign-up for Spammers

Spammers might try to contact you through various ways, like sending you unknown emails in which they try to offer you various amenities in exchange for your subscription to them. We advise you to avoid these emails, and some ways of detecting mail are listed below:

  1. Any mailing address claiming to be a business or related to any big MNC ending with another country code that you don’t know can be Spam.
  2. Messages with messages like Urgent, Offer, and Congratulation are usually Spam.
  3. A spammer might add an attachment that seems to be secure.
  4. Along with some catchy but if you don’t know the sender, then you don’t need to open that mail.
Conclusion

So far, we have discussed all the possible ways by following which you can manage spam mail in AOL account and control mail from unknown senders. However, if you still have any trouble with incoming mail in your AOL account, you can contact our AOL email technical experts, who is provide you the necessary solution within the minimum time possible.

How to Transfer AOL Mail to Gmail?

Are you searching for a solution to Transfer AOL Mail to Gmail? If you answer yes, you have reached the right page where you should be. By the end of this article, you will be able AOL Mail to Gmail without any issues or additional efforts.

And maintaining these accounts takes time. Users using AOL mail want to Migrate AOL Mail to Gmail. Let’s take a look at the responsible factors:

Why Transfer AOL Mail to Gmail?

There are multiple reasons for Migrating from AOL Emails to Gmail, and below are some of the common reasons:

  1. AOL is not providing updates, so most users switch from AOL mail to Gmail.
  2. Gmail offers enhanced security options, making it more secure than any other email application.
  3. Besides better security features, Gmail offers a complete package of productivity tools and business collaboration services.

How to Transfer AOL Mail to Gmail?

Gmail offers an inbuilt feature to import mail and contacts from other email providers directly. This function allows you to Forward AOL Email to Gmail effortlessly. Let’s take this function:-

Step 1. Learn to Transfer AOL Mails to Gmail

If you are having dilemma about How to Forward AOL Mail to Gmail Account Manually? Then login into your Gmail account, and follow the given steps.

Gmail Transfer to AOL

  • After logging in, navigate to the gear icon in the top right corner and choose the See all Settings option.
  • Go to the Accounts & Import tab and click the Import mail and contacts option.
  • A pop-up will now appear on your screen; you can enter your email address and Password.
  • Click on the continue button and enter the required Password.
  • After entering the Password, press the continue tab.
  • Lastly, tick on the AOL items you wish to import and click on the start import tab.
  • After completing your AOL migration, tap the OK button to close the pop-up message.

This method is appropriate for all technical as well as all novice users.

Step 2. Import Contacts & Messages From AOL into Gmail

Once you Transfer AOL Mail to Gmail, you can start importing your contacts and messages from AOL to Gmail. Here’s how you can do it:

Accounts and import Transfer AOL mail to Gmail

  1. To begin, sign into your Gmail account.
  2. After logging in, you can move forward to the cog icon on the right side, and from there, you can choose Accounts>>Import.
  3. Next, go for the Import mail & contacts option and enter your email id in the dialog box.
  4. Once you have entered your credentials, click the Next button.
  5. Select the continue option, then check the Import contacts and Import email dialog box.
  6. Now, you can choose the Start Import option and Press OK to end the session.

You will also find the import procedure will take a while, depending on how busy the server is and your number of contacts and emails. Once your Procedure is complete, you will find a clear copy of all your AOL contacts and inbox in your Google account.

Step 3. Send Mail From Your Gmail With AOL Email Address

  • To start, Sign in to your Gmail account.
  • Once you signed in, choose the Cog icon>>Accounts & import tab.
  • Then, you can select Add another email address from the dialog box and enter your email address.
  • After adding your email address, click on the Next option>>Send Verification.
  • You can now sign in to your AOL address & verify your email.
  • Go to a New Mail in Gmail, and in the From menu, select your AOL email address.
  • When sending an email, you can also select your AOL or Gmail address to display in the From section.
  • Your receivers can reply to the contents of your Gmail, and whenever they reply to the AOL email address, the response will automatically get forwarded to Gmail.
  • You will also have the option to set this function as permanent.
  • Move forward to the Accounts & Import option>>Send Mail tab.
  • In the end, choose AOL as default.

Related Page:  How to Recover Hacked AOL Email Account

What is the Procedure For checking AOL Emails on Google Account?

Now, you know how to Transfer AOL Mail to Gmail, import your contacts and messages, and send emails from your Gmail with your AOL email address. With that, you can also check your AOL emails on Gmail with the following steps:

add a mail account transfer to AOL mail to Gmail

  1. Run the “Accounts & Import” option and add a POP3 mail account to forward your emails.
  2. Once you finish that, enter your AOL email address & Password.
  3. Check your Label incoming messages dialog box to forward AOL emails to Gmail.
  4. It will also permit you to separate from the regular emails.
  5. Before choosing the add account option, Press on the Leave a copy tab.
  6. It will also allow you to leave a mail copy in your AOL.

How to Copy Emails From AOL to Gmail?

To copy your AOL emails into Gmail, you must install a desktop emails client such as Thunderbird or MS Outlook. Once you install the email client, you can execute these steps:-

Firstly, connect your AOL account to the app using the IMAP settings.

Add a Mail Account to AOL Transfer to gmail

  • Then, connect your Gmail account to the application and drag & drop your emails from your AOL to your Gmail account.
    But, before you Transfer AOL Mail to Gmail manually, there are a few things that you need to keep in mind:-
  • Using your hard drive storage, the application will temporarily copy your AOL email account.
  • For the migration to finish successfully, you must have enough storage space for the full archive of your AOL mail on your hard drive.
  • The copying procedure can take a while if you have multiple messages and folders in your AOL account.
  • We don’t recommend manual copying for accounts with over 10,000 items and 10 GB of utilized storage, but even the smaller accounts can take several days to sync properly.
  • Your computer needs to stay on during the drag & drop procedure.
  • Some email messages and folders may not get copied, especially if the power supply or broadband connection is interrupted.
  • Transferring AOL emails to Gmail may speed up work on your computer.

Bottom Line

Migration from one account to another is always challenging. To simplify the process, we have mentioned some useful tips to help you Transfer AOL Mail to Gmail account. Further you can contact us via live chat or email for more related queries.

How to Change AOL Mail Password Without Phone Number?

It is crucial to keep your account safe & secure, but there are times when we forget our passwords, which happens quite often, so we need change AOL Mail Password in the same way.  If that’s the same thing that happened to you or you are just looking forward to changing your AOL mail password.  You have come to the correct page where you should be.

To help you, we have got some lifesaving hacks that will help you change your AOL mail password without a Phone number.

What is the Procedure to Change AOL Mail Password Without Phone Number?

To recover your Password without the registered phone number is difficult but not impossible. Hence, you can follow the steps to retrieve your AOL mail password without a phone number.  If the user has no phone number registered with AOL to recover their Password.

Change AOL Mail Password

  1. Navigate to the AOL login page and click the “forget password” option.
  2. You must enter your screen name and email address on the password verification page.
  3. Enter the letters and numbers within the “Word in Picture” dialog box.
  4. Now, click the Next option and select the choices according to your requirement.
  5. Hit the Submit button and enter the alternate email address you provided at the registration time.
  6. Enter the solution for your account security question in the “Your Answer” dialog box. And press the Submit button.
  7. You can now choose and enter the new Password in the required fields. Then, click on the Submit option.
  8. Finally, your Password has been changed; you can try logging in again to see if it works.

If you cannot continue, you can’t check in to your account; you’ll contact the AOL Gold Download Install service anytime. But some useful programs will save you some passwords; otherwise, you can access them online.

That’s the solution to changing the AOL mail password without a Phone Number. What if you do not have an alternate email address? We have the perfect solution for users without access to their alternate email accounts.

Related: AOL Login Screen and Password

Password Recovery in AOL Mail Without Alternate Email Address

Do you need an alternate email address to recover your AOL password? Then, don’t worry. You can use the following steps to retrieve your Password without the email.

Change AOL Mail Password without Email

  1. Before starting the process, you must run the AOL login page.
  2. After that, you must enter your account by entering your username.
  3. Hit the Next option and then click on the forget password option.
  4. Then, once again, you must add your username and press the Next button.
  5. Enter your mobile number linked to your AOL account and request a verification code.
  6. Once you receive a code on your mobile phone, please enter it in the required dialog box and tap the Next button.
  7. If you are verified, it will allow you to create a new password.
  8. Next, click on the Save option.

You can also contact us via Toll Free No.: +1855-356-3099 or send us a Email at info@connecthelpline.com if you still have any issues or queries.

Bookmark Your Favourite Website on AOL Desktop Gold

Retrieve Password of AOL Mail Via Security Questions

Other than the traditional ways for changing Passwords, there is yet another way by which you can recover your Password, which involves security questions you set up when creating your account.

Change AOL Mail Password with Security Question

  1. Select the Security Question that you want to answer.
  2. Enter the answer to that question.
  3. Lastly, click on the Next button.

If your answer is correct and you will see the dialog box in which you must enter a new password. Once you have entered the new Password and click the Next button. After going through these methods and you can log back into your AOL account using your new Password.

Resolve AOL Error Code AC-3101

Conclusion

In case you need an instant solution for AOL mail-related queries, then you can get in touch with our expert team. They will provide complete information on changing AOL Mail Passwords without a phone number. You are free to chat with us 24*7.

How To Fix The Update Failed Error Message

To upgrade your operating system is extremely significant. Windows 10 is one of the excellent operating systems for millions of users across the globe. However, because of its popularity, there are multiple issues faced by users while using Windows 10. Among these errors, update failed error where you can’t update your operating system with attractive features is one of them. Microsoft has rolled out new upgrades for Windows 10 to troubleshoot the errors or evaluate performance further. These upgrades can patch up crucial security holes and decrease the danger of damage or smooth your system in an excellent pattern.

Various users encounter error messages associated with Windows update failure. It includes error pop-ups like Windows Update Failed to Install or Install Failed. Few reports say no error message, but the upgrade procedure holds on and can’t move ahead for a long time. There are various methods to fix Windows Update failing errors that will be mentioned in this write-up. You can implement these methods to eliminate Windows Update failing errors.

Factors Behind Windows Update Failed Error

When it comes to Windows Update error failing multiple times, there are many factors available that are responsible for producing it.

  • Missed or Corrupted System Files:

System files are significant to ensure that everything operates on your device. Damaged or corrupted system files are present there, causing Windows Update to Fail.

  • Outdated Drivers:

Drivers are required to get components that come with Windows 10 accessibility like graphic cards, network cards, etc. If a driver is associated with this error upgraded in a while, that can cause Windows Update errors.

  • Windows Update Error:

There might be a case that something gets wrong with your upgrade service itself. Alternative methods are used to download the recent

  • Windows 10 upgrade below.

Always remember that the above list doesn’t contain all possible causes. Update error may be caused because of a unique issue in your computer. Never panic if you can’t upgrade Windows 10 error.

Firefox Windows 10

Repairing Methods To Troubleshoot Windows Update Error

Some troubleshooting ways are available to fix Windows Update errors.

Step – 1: Activate the Windows Update Troubleshooter Tool

Microsoft has a troubleshooter tool to assist with errors with Windows 10 upgrades. This tool is available free of cost to download. Simply activate the tool and observe if you can recognize and troubleshoot errors.

  • Firstly, download the Windows Troubleshooter tool. For that, you need to visit the official website of Microsoft, which is verified as completely safe and trustworthy.
  • Locate the WindowsUpdate.diagcab file from the Downloads folder in your local Storage.
    Thereafter, click on the folder a couple of times to open it. It will establish the troubleshooter window.
  • Lastly, go through the on-screen instructions. If the troubleshooter can’t recognize the issue, simply tap on them to automatically apply rectification procedures.

Make a note that Windows Update Troubleshooter is not always right. If even the troubleshooter tool can’t find any error, you must continue with steps until you search for something that works to overcome Windows Update Failed error.

Step – 2: Reinstitute Windows Update Associated Services

If a service associated with Windows Update can cause the issue due to wrong settings, it must be switched off. Simply resolve this error by executing commands that reset services by delivering upgrades.

  • Tap Windows+R keys on your keyboard to establish the Run utility.
  • After that, enter cmd and click Ctrl+Shift+Enter. It is going to establish the Command Prompt with administrative permission.
  • If notified, confirm to allow the Command Prompt to create changes on your device. It means that you need to sign in to an administrator account.
  • Thereafter, stop the services associated with downloading and establishing Windows Update files.
  • Furthermore, within the command prompt,
Type the following lines, clicking the Enter key between each line.
    1. Net stop appidsvc
    2. Net stop cryptsvc
    3. Net stop wuauserv
    4. Net stop bits
  • After restricting the services, enter the following input commands, tapping the Enter key after each line.
    1. Ren %systemroot%\Software Distribution SoftwareDistribution.old
    2. Ren %systemroot%\system32\catroot2 catroot2.old
  • Finally, restart Windows and update associated services using the following commands. Again, tap Enter after each new line to run the command.
    1. Net stop appidsvc
    2. Net stop cryptsvc
    3. Net stop wuauserv
    4. Net stop bits
  • Switch off the Command Prompt and examine if your Windows Update has been rectified after running the commands.

This might have helped you fix the update fail issue you are facing.

Firefox update

Step – 3: Use System File Checker (SFC) Scan

System File Checker, as the name suggests, is a tool to scan and resolve any problem in your file. If the Windows update fails, an error is happening because of a corrupt file, then this is the tool you need to run.

  • In order to initiate the scan, you first need to open the Run command utility. To do so, press the Windows+R keys on your keyboard simultaneously.
  • After that, in the given space, type cmd, and instead of hitting the Enter key, go ahead with Ctrl+Shift+Enter keys together. This will let you access the Command window with admin permissions.
  • Next, remember to select Yes on the prompt window to allow this software to make changes to your desktop.
  • Once the Command tab is up on your screen, put sfc/scannow in the command box and click on Enter to start the procedure.
    Thereafter, you will have to wait for some time to let the SFC scan finish.
  • Note that the scanning process can be time-consuming. Therefore, you should neither close your PC nor the Command prompt window.
  • Finally, when it is over, restart your PC.

You might now be able to update your Windows 10.

Step – 4: Disable Your Antivirus Temporarily

There is a possibility that you are unable to go ahead with the update process because of certain restrictions from your antivirus. In order to make sure that this is not the reason behind the same, try disabling it for a while and see if you are able to resolve the problem.

  • First of all, start your PC and go to the Taskbar at the bottom of the home screen.
  • After that, right-click the same on a vacant area where no icon is present and select the Task Manager option.
  • Next, click on More Details to be able to access all the options available on the Task Manager.
  • Furthermore, choose the Start Up option from the Menu Bar on the window.
  • Thereafter, a list of options will open up on your screen.
  • Here, you need to look for your antivirus and when you locate it, hit the same.
  • On the following window, you will see the Disable button, select the same and then click on the time frame for which you want to choose.
  • Lastly, restart your system and go ahead with the update process.

Remember to enable the antivirus again once it is over.

Step – 5: Run DISM Command

If nothing has worked for you yet, don’t sweat. There are other solutions too in order to fix the problem. Using the DISM command can help you deduct any corruption on your PC and fix it by itself.

  • First, you need to open the Run Utility on your system. Hit the Windows and the R keys on your keyboard in order to do so.
  • From here, go to the Command window with administrative permissions. To do so, type cmd and press Ctrl+Shift+Enter on your keyboard.
  • Thereafter, on the command box action bar, copy-paste DISM.exe /Online /Cleanup-image /Restorehealth and press the Enter key.
  • Now you need to be patient while the software does its function and troubleshoot the issue for you.

Finally, restart the system again and update your Windows.

Firefox Windows 10 update

Step – 6: Use Backup To Restore Windows 10

One more method that you can try is to restore your system to the point where you were able to install and update the Windows without an update failed error.

  • First of all, close all the windows running on your PC and press Windows+S to open the Search bar.
  • Here, type Restore, and from the list of options that appear on the window, select Create a Restore Point.
  • This will directly take you to the System Properties tab.
  • After that, go ahead and follow the guidelines available before you in order to look for an old restoration point.
  • This will help you go to the point.

See if you have resolved your upgradation error code.

Related Page:  Firefox Cant Load Websites But Other Browsers Can

Winding Up

It is important to update your Windows to its latest version in order to run your tasks smoothly. However, there are times when you might face an Update Failed Error Message. This indicates that you are unable to proceed with the update. In case you are also troubled with the same, you can simply follow the solutions mentioned in this blog, and that might do the job.

For any additional help, you can get in touch with our IT experts over a call, via live chat, or through email, and we will assist you through the issue.

Firefox Not Responding or Hangs

Firefox is one of the most significant web browsers and is popular among multiple users worldwide. However, it’s a perfect alternative for several browsers like Chrome, Safari, and Microsoft Edge. The Firefox browser keeps on upgrading to ensure a great experience for the users. However, you may experience Firefox not responding or hanging at multiple instances when using the browser. Besides, there are multitudinous reasons that can cause the Firefox browser to take place. Follow this full post to learn about the possible reasons and troubleshoot steps to fix Firefox not working issue.

What Takes Place When Your Firefox Does Not Respond?

The Mozilla Firefox is not responding; the browser freezes and stops reacting over multiple commands. In this situation, you can’t move your mouse on the screen. In simple words, your Firefox browser stops responding. Moreover, you will get a small window in the middle of the screen with a short message Firefox not responding or Firefox already running but not responding error. Such error texts become more irritating as carrying on happening once it seems. So, go through troubleshooting methods to rectify Firefox’s not responding error. If Mozilla Firefox is not working, responding, or hanging, this write-up will assist them in troubleshooting easily.

Multiple Reasons Behind Firefox Isn’t Responding.

Various causes behind Firefox’s not responding are listed below to rectify this problem easily.

  • Because of some malicious add-on recently attached to Firefox
  • Corrupted, lost, or missed database files
  • Some procedures are hanging without any prior notification
  • Web browser not responding because of operating system file error
  • Disturbance from other existing browser settings
  • Repetitive visit to a malicious website
  • The web page script might have become non-responsive in the Firefox browser.

Troubleshooting Steps To Fix Firefox Hangs Or Is Not Responding Issue

A few simple troubleshooting steps are given below to fix Firefox hangs or is not responding.

Solution 1: Turn Off Forcefully the Browser Window

  • Tap the Ctrl+Shift+Esc keys together that open the Task Manager Window.
  • Get the Firefox browser and choose it under the processes tab
  • Tap on the End Task button available a the end of the window screen to exit from the browser application.
  • Restart and establish the browser to examine if the error has been rectified or not.

Solution 2: Turn The Hardware Acceleration Off

Hardware acceleration enables Firefox to utilize your system’s graphics processor to show heavy graphic content. It remains turned on by default. However, turning off the Hardware acceleration can help in resolving the freezing problem in Firefox. Follow the below-given steps:

  • Go to the menu button and select the Options tab.
  • Now go down to the Performance section located underneath the General tab. Uncheck the box Use recommended performance settings, and it will show the hardware acceleration option.
  • Here, you need to uncheck the box for Use hardware acceleration when available.
  • Now go to the menu and click on the Exit option to quit.
  • In the end, start Firefox to check the error status.

Solution 3: Examine for Browser Updates

Sometimes, potential threats and issues to Firefox come from outdated browsers. To examine for browser updates, tap on the Firefox menu icon. Next, you observe a Help option under which you have to choose the About Firefox option. So, a window accesses that displays whether the browser is updated or not.

Solution 4: Uninstall or Delete the Add-on

Another method to troubleshoot Mozilla Firefox is to delete the recently established add-on to your browser. For uninstalling, tap on Menu and then press on Options. Choose extensions and themes on the left side. Now, observe the extension you want to delete.

Solution 5: Remove Caches, Cookies, and Site Data

Mozilla Firefox stores cache, cookies, and site data that allows the browser to load the page quickly and provides a personalized experience for users. The step that takes place once you visit the website that leads to a large amount of data. Slowly, it brings issues, and you must delete caches, cookies, and site data.

Solution 6: Scan Malware and Virus

Viruses and potential threats have become one of the primary reasons for Firefox not responding issue. This tool might affect and change important files restricting them from working appropriately. Therefore, examine viruses or malware. Enter Virus and Threat Protection at Taskbar in the search box. Establish Programs under Virus and Threat Protection, then tap on Scan options. Choose the Full Scan option and let the procedure complete.

Solution 7: Check If Updating Your Graphics Drivers Helps

If none of the above solutions has helped in the error resolution, update your graphic drivers. Updating drivers can fix the bugs and eliminate the compatibility issues to resolve the Firefox not working issue. Additionally, updating your drivers on a regular basis also ensures the optimal performance of your machine. You can get it done in two ways:

  • Updating Drivers Manually

The first procedure to update the driver is more demanding as it requires you to be tech-savvy to find the right driver online, download it and install it correctly on your device. You may get several drivers for your device as they keep updating regularly. To install, you need to go to their official website and download them manually. Once downloaded, save the executable file to a suitable location and then open it for installation. Follow the instructions given on the screen to finish the task.

  • Updating Your Graphics Drivers Automatically

The second procedure is automatic, which is also a recommended procedure for installing the drivers. In this method, you don’t need to put more effort. Besides, even the newbies can also get it done with simple steps. You can utilize Connect Helpline to update your drivers automatically. Besides, you don’t even need to worry about the right driver as Connect Helpline recognizes your system and finds the right driver for you online. It prevents users from downloading and installing the wrong drivers. Furthermore, the installation process completes in a fail-safe manner in this method.

Solution 8: Create A New Places Database For Error Resolution

If Firefox is freezing now and then, it is possible that the “Places” database is corrupted. To fix this, you need to create a new “Places” database by following the below-described steps:

  • Click on the menu buttons you may recognize with the three lines and then select Help.

Create a new places database

  • Next, you need to click on the Troubleshoot Information, and the same tab will open on your screen.

Create a new places database 2

  • Thereafter, you need to go to the Application Basics section.
  • Here, try to locate the Profile Folder, and once found, click Open Folder and it will open the profile folder.

Create a new places database 3

  • Alternatively, you may open the profile folder by typing %APPDATA%MozillaFirefoxProfiles in the Run dialogue box.
  • Moving ahead, click on the menu button and select Exit and wait for Firefox to quit completely.

Create a new places database 4

  • Now that the profile folder is already opened go down and find the file places.sqlite.
  • Right-click on this file and select Rename.
  • Add .Old at the end of the file name so that it would look as places.sqlite.old.
  • Also, perform the same procedure to rename the places.sqlite-journal file if it exists.
  • places.sqlite-journal >> places.sqlite-journal.old.

Create a new places database 5

This procedure will remove your browsing history and daily bookmarks. Restart the Firefox and check if the freezing problem is resolved. If not, move to the next solution.

Solution 9: Delete Duplicate Session Restore Files 

Session Restore is a time-saving feature in Firefox that saves open windows, tabs, and other information. However, the multiple copies of the Session restore piling up in your Firefox can cause problems when opening it. It can be a possible reason behind the Firefox freezing issue. Fix the error by deleting duplicate sessions by using the below-stated steps:

  • In the beginning, you need to click on the Menu button depicted by three lines.
  • After that, select Help to proceed to the next step.

Delete Duplicate Session Restore Files

  • Here, you have to click on the Troubleshooting Information option.

Delete Duplicate Session Restore Files 2

  • When the selected option opens, go to the Application Basics section.
  • Locate the Profile Folder and next to it, click Open Folder. It will open the profile folder.

Delete Duplicate Session Restore Files 3

  • Alternatively, you may type %APPDATA%MozillaFirefoxProfiles in the Run box to open the profile folder.
  • Again, go to the Menu button located in the upper right corner of Firefox and select Exit. Patiently wait until the Firefox quits completely.

Delete Duplicate Session Restore Files 4

  • Thereafter, go to the profile folder we have just opened. Here, you need to locate and delete the sessionstore.js file and also the duplicate copies, such as (sessionstore-1.js), (sessionstore-2.js).

After the error-free execution of the above-listed steps, you may try to restart Firefox and check if the error is resolved or not.

Fix 10: Troubleshoot The Corrupted System Files

If none of the above-given solutions brings luck to the error resolution, you need to check and fix the corrupted system files. A missing, damaged, or corrupted Windows software file can be one of the most apparent reasons behind the Firefox not working issue. Repairing the damaged Windows system files can help you in the error resolution.

To repair, you may run automated tools from the Internet. They will run a deep scan of your Windows system to identify the prevalent issues and troubleshoot them automatically. Once resolved, you can get rid of the Firefox not working or freezing issues. Restart your Firefox, and it should run with its utmost efficiency.

In Conclusion!

The above troubleshooting steps will assist you in fixing Firefox hangs or not responding to the issue instantly. You can implement them to resolve this problem in Mozilla Firefox. If you can’t rectify this problem, you must dial the Mozilla helpline number to troubleshoot the issue.

Firefox Cant Load Websites But Other Browsers Can

Mozilla Firefox is an open-source web browser that is so widely used for browsing and searching for information. This is a known application world over and has been developed by the Mozilla Foundation and the Mozilla Corporation. Mozilla Firefox is available for Windows 7 and its later versions like Windows 8, 10, and also for macOS, Linux, etc. In December 2021, Mozilla Firefox ranked fourth globally with an 8.35 percent share in usage.

Even though it is a wonderful web browser that has served us for years, it is not free of discrepancies and errors. Like it happens with any other software, it is also prone to issues once in a while. Mozilla Firefox users report certain issues with Firefox usage. The problem caused an alarm in the global community as this issue was being reported repeatedly. The issue arises when you start loading pages on Mozilla Firefox. Have you also encountered this issue? If yes, take a look at the solutions that we discuss in this blog further.

How to fix Mozilla Firefox pages not loading error?

Given below are some potential solutions that can quickly fix the Mozilla Firefox pages not loading error. You may try any of these solutions to get rid of this vexing problem of Firefox not loading pages.

1.) Ensure you have a proper internet connection

This particular error of Mozilla Firefox, not loading could occur because of a faulty or a poor internet connection. If the connection is not of the speed that loading pages require, then this might be causing the problem. Verify that your internet connection is working absolutely fine. You can also switch from a wired connection to a wireless one if the problem persists and refuses to be solved.

2.) Refresh Firefox

In place of searching for hours and locating the issue, restarting or refreshing Firefox can save you a lot of time and energy. It can be a game-changer as doing that can sometimes resolve the issue on its own.

You should follow the steps below to refresh Firefox:

a.) Go to the top-right corner, click on the three horizontal lines there and then navigate to Help.
b.) On the Help menu, pick “More troubleshooting information.”
c.) After that, click on the Refresh Firefox button
d.) In the pop-up window that appears, just hit Refresh Firefox

On refreshing Firefox, all your extensions will be removed, and all the customization settings will be reverted. Should you be not comfortable doing this, you can just close the browser once and reopen it again.

3.) Clear Firefox Cache & Cookies

Just like other browsers, Mozilla Firefox also stores a lot of data in the form of browser cookies and cache. These caches and cookies are later used to speed up the website loading by keeping some information about the site that is used later. However, there are times when this accumulation of data or cache obstructs the browsing experience of the user. Therefore, it is extremely imperative that you get rid of these cookies and cache. Follow the below-given steps to clear the browser cache and cookies.

a.) First of all, open up Firefox
b.) On the top-right corner of the browser, you will find three horizontal lines. Click on those lines.
c.) Go to History and then to Clear Recent History
d.) Check the boxes for Cookies, Caches, and Browsing & downloaded history.
e.) Under the heading “Time range to clear,” choose Everything from the drop-down menu list.
f.) Finally, click on OK

clear recent history

4.) Choose Standard Tracking Protection

Enhanced Tracking Protection of Firefox has three levels of security, namely Standard, Strict, and Custom. Strict is the most restrictive of all three. It tends to block nearly every on-page element. While it is beneficial from a security point of view, it can harm the loading of pages of the website. If your Firefox has enabled strict mode, then it is better to the standard mode. The steps below should be able to help you do that:

a.) Open the browser and go to about:preferences#privacy page.
b.) After that, choose Standard mode and pick the “Reload All” tabs button
c.) After the tabs reload, try loading your desired website and check if the Firefox not loading websites error has been resolved or not.

Browser Privacy

5.) Disable Extensions

Add-ons and extensions, especially those related to JavaScript’s can hinder the ability of Firefox to load webpages easily. If you start the browser in the safe mode, all the extensions will be disabled, and then you can perform the subsequent operations accordingly. Follow the succeeding steps to disable extensions:

a.) Open the Mozilla Firefox browser
b.) At the browser’s top-right corner, click on the three horizontal lines available
c.) Choose Help and then access the Troubleshoot Mode option
d.) Click on Restart in the dialog box

Troubleshoot mode

Troubleshoot mode Restart

6.) Disable DNS Prefetching

A DNS Prefetch attempts to resolve domain names before the browser requests the resources. As a consequence, the browser loads the site a few seconds before. However, this process of prefetching can sometimes cause the loading of incorrect configuration leading to the browser not loading the webpages. Thus, it is best that this particular feature is disabled so that there is no issue with the loading of webpages in the browser. The steps mentioned below can help you do that:

a.) Launch the browser and access the about:config page in the address bar of the browser
b.) Give permission in the form of the “Accept the Risk and Continue” button
c.) Type in network.dns.disablePrefetch in the search bar and press the Enter button
d.) On the extreme right, click on the Toggle button and change its value from False to True
e.) After that, reload the sites and check if the issue has been resolved

Proceed with caution

7.) Try reinstalling Firefox

Reinstalling is a common recourse for almost all sorts of issues. Uninstalling and reinstalling the browser is a sort of quick fix for a range of problems. Here too, if the aforementioned methods do not work, then try uninstalling and then reinstalling the Mozilla Firefox browser. Since everything would start afresh, it could also resolve the issue you are facing. Here’s how you can do that:

a.) Access the Start menu and then look for “Apps & Features.”
b.) Now, go to Mozilla Firefox, choose it, and then hit the “Uninstall” command.
c.) After you have completed the uninstallation, open the File Explorer and go to C:\Program Files\Mozilla Firefox
d.) Finally, delete all the contents of that folder

Conclusion:

In this write-up, we have attempted to provide you with the troubleshooting methods that can resolve the “Firefox unable to load pages” error. However, these steps might not prove to be the perfect solution every single time. For such situations, you might have to seek professional support.

We are a bunch of professionals who deal with such issues. Our team is highly proficient and well-equipped to resolve all kinds of queries. If you are encountering any such troubling issues, you should contact us immediately. We guarantee seamless & reliable support for all your issues. You are welcome to contact us through our website–>[connecthelpline] or send us an email at [info@connecthelpline.com]. We look forward to serving you better.

AOL Wont Let Me Reset My Password

AOL mail password not working is a common issue that users report now and then. When this issue occurs, you may not be able to access your AOL mail. AOL mail is one of the most popular email services, which is highly preferred among users in establishing their day-to-day communication. Your password enables access to AOL’s incredible services. However, if you are having trouble with the AOL reset password procedure, you need to fix this issue immediately. If not, your AOL mail can be misused. Reading this post until the end can help you with your quest on “how do I retrieve my AOL password?”.

What is AOL Mail?

AOL mail is one of the most favoured email services that have millions of users across the globe. It is a free web-based email service from AOL, which is a division of Verizon Communications. It has many incredible features, such as a 25 MB email attachment limit, unlimited mailbox size, spam and virus protection, spell checking, personalized domains and more. To keep it running, you need to prevent it from being inactive for 90 days. You can access all these features with the help of your mail’s login credentials. Besides, you can reset your AOL lost password with the help of a few simple steps.

How Do I Reset My AOL Password For My Email Account?

There are various instances when you may need to change or reset your AOL password. For instance, if you don’t remember your old password, you can reset it using a few simple steps as stated in the below-given list:

  • Firstly, you need to make a visit to the Sign-in Helper page.
  • Here, you need to choose between suitable account recovery options.
  • Moving ahead, click Continue.
  • Now follow the instructions given on the screen to reset your AOL password.

How To Change AOL Password?

Changing the password for your email address on a regular basis can keep it safe from the hovering security threats. Besides, it also keeps the undesired intruders at bay. If you are not sure how to change AOL password, the below-given steps can help:

  • First of all, go to the Account security page.
  • Next, you need to click on Change password.
  • Once done, you need to choose a strong password and enter it in the specified area.
  • In the end, click Continue to finish the task.

Note: You can also take a note of your new password in case it is forgotten. Always choose a strong password, which is often a combination of letters, numbers, and special characters. Don’t use your social information when choosing a password.

AOL Won’t Let Me Sign In – How To Fix?

There is a myriad of reasons that can prevent you from resetting your AOL mail password or logging into your AOL mail account. In such a case, you can try out some basic troubleshooting solutions to get rid of the error.

1: Sing-in Again To Resolve The Issue

It works the same as turning off and on. If you are having trouble resetting your AOL mail password, sign out of your account and then sign into it again. It can be a helpful step when a bad password or the browser issues are promoting the error when resetting your password.

2: Modify Your Web Settings

When you have multiple browsers installed on your system, it can change your web settings. In such a case, you need to change your web settings manually in order to change the settings of all internet browsers on your device. When the browser is configured to support the process, try to reset your AOL mail password once again.

3: Resolve Common Password Issues

When you are not sure how do I find my AOL password on getting errors on applying the standard process, you need to resolve your common password issues. For instance, when logging into your account, if you are getting an error message that reads – “Invalid password. Please try again.” It means you are using an incorrect password. Make proceeding any further, make sure that your password is correct and you are not making any typo errors when entering the password. Try to reset AOL password without security questions if you don’t remember your password any more.

4: Switch Your Internet Browser

Sometimes, an outdated version of your Internet browser can promote errors when resetting your AOL mail password. In such a case, using a different web browser can be your answer to “how do I reset my AOL password?”.

Related Page: AOL Mail Not Working

AOL Mail Not Working

Are you also facing issues in your AOL Mail? Well, you are not the one to face this. Many AOL users are facing AOL Email not working issues on daily basis. The fact is, AOL mail not working is not a big issue, although it can be a challenge for the user when they don’t know how to get it resolved and they fail to check their new emails. In case, if you don’t want to get in trouble with your AOL mail, then read this blog till the last word. As in this blog, we are going to provide you with all the relevant information about the AOL mail, not working issues.

Reasons Behind AOL Mail Issues

Some of the fundamental reasons due to why users may face AOL mail issues are as follows.

  • Weak Internet Connection
  • The web browser is not compatible or is outdated
  • The mail server is down
  • Mail account settings are not correct
  • Third-party applications like antivirus software are disabling the website to work efficiently.
  • Incorrect login credentials
  • Technical errors

Common Problems with AOL Mail

A mail server works properly with many technical factors. If even a single factor fails to work properly, then there can be chances of facing errors. The same applies to AOL mails as well. There can be multiple or different issues that a user may face while using the AOL mail services. Now, let’s have a detailed look at the common problems that AOL mail users can face while working on it.

Problem 1: AOL Mail Not Working on Google Chrome

Almost every citizen of the world is using the Google Chrome Web Browser for doing web searches, and that’s why the most frequent errors that AOL Users face are related to Google Chrome. Sometimes, AOL mail may fail to work on Google Chrome, and to get the AOL Mail not working with Google chrome issues resolved, here are the steps that you can follow.

  • First of all, open google chrome and click on the three dots available at the top right side of the screen.
  • After that go to the “More Tools” > “Extensions”.
  • Now, remove all the unwanted extensions that are attached to your browser.
  • After that, clear all the browsing history of your browser and make sure to change the time range to “All Time”.
  • Then update your Google Chrome to the latest available version.
  • At last, factory reset the browser’s settings by going to the Settings > Advanced > Reset and Clean Up. Now click on the option displaying “Restore Settings to their factory default”.

AOL Mail Not Working on Google Chrome

After following the above steps, you have now successfully made the necessary changes in your Google Chrome to get the issue resolved. In case, if the issue still exists, then it indicates that there is not a problem with Google Chrome, there is something else that still needs to be resolved.

Problem 2: AOL Mail Not Working on iPhone

If your AOL Mail is not working on iPhone 2021 then here are the steps that you can follow to get the problem resolved.

  • Hard Reset the AOL application: The easy way to fix the AOL mail not working issue in the iPhone is to reset the AOL mail application. Hard reset simply means closing all the background running applications and then launching the mail application again.
  • Now, turn on the Airplane mode for a few seconds and then turn it off.
  • This process usually gets the internet issues resolved. After that, try to open the AOL mail on your iPhone and check for the presence of the error.

AOL Mail Not Working on iPhone

Problem 3: AOL Mail Not Working on MacBook Pro

If you are also facing the AOL Mail not working on Mac problems, then below we have mentioned the steps that you can follow to get the error resolved.

  • First of all, you need to verify the account settings. If the user account information and the email settings are not correct, then you may encounter the AOL Mail not working on MacBook Pro.
  • Now, check for the internet speed and then refresh your AOL mailbox.
  • This issue can be solved by running the Connection Doctor. After running this tool, it will tell you the reason due to why the error occurs so that you can easily perform the desired steps to solve that specific error.

AOL Mail Not Working on MacBook Pro

Problem 4: AOL Mail Not Working with Outlook

If your AOL email has stopped working in Outlook, then here are some of the methods that you can follow to solve this problem.

  • Update Login Password: When you have changed your Login password over the internet or through a web browser, then you have to change it in Outlook too. As the password will not update automatically. So, to update the login password of your AOL mail account, open the Outlook application and go to the account settings. After that, choose your AOL mail account and then update the password.
  • Update the application to the latest version: When you are using an outdated version of the Outlook application, then there are chances that Outlook will not be able to work with the latest security settings of your AOL account. So, updating Outlook to the latest version can directly lead to the better functioning of the AOL Email.
  • Additional Ways: Clear the cache and cookies of your browser’s history and make sure that the incoming server details are right. 
Protocol Server Settings Port Settings
POP 3 Incoming Mail Server: pop.aol.com POP3-995-SSL
Outgoing Mail Server: smtp.aol.com SMTP-465-SSL
IMAP Incoming Mail Server: imap.aol.com IMAP-993-SSL
Outgoing Mail Server: smtp.aol.com SMTP-465-SSL

AOL Mail Not Working with Outlook

Problem 5: Not receiving new mails on AOL Mail account

So, if you are not able to receive new AOL emails on your email account, then here are the steps that can help you to resolve the problem.

  • First of all, check all the filters that you have added to your AOL account.
  • Now delete or disable all the filters that are of no use.
  • Also check the spam or junk box, as sometimes, the new mails can directly go to that folder.
  • In case you received an important mail in the spam folder, then select it and mark it as “Not Spam”.
  • At this stage, also make sure that you have not added any contact to the black list.
  • Also wait for a few moments, as sometimes there can be a delay in receiving new emails due to heavy network traffic.

Not receiving new mails on AOL Mail account

Problem 6: AOL Mail Not Working on Windows 10

The main problem that the AOL mail users are facing on Windows 10 is that they are not able to sync their mail with the windows 10 mail app. Now, here are the steps that you can follow to get the problem resolved.

  • Disable the two-step authentication: If you are not able to sync your AOL email with the Windows 10 email account, then there might be an issue with your email account. Many AOL email user’s two-step authentications to protect their email accounts. Although, the two-step authentication is a useful feature, but sometimes this feature can cause problems in the Windows 10 mail app. The AOL mail not syncing is with the Windows 10 mail app can be one problem with that. So, simply disable the two-step authentication in your mail settings and then check if you can sync the mail with the windows 10 mail app. Many AOL email users have reported that after disabling the two-step authentication, they have successfully synced their AOL email with Windows 10 mail app.
  • Reset your Mail App in Windows 10: First, go to the settings application and then go to System > Apps & features. Then click on the mail app and then go to the Advanced options link. Then on the next page, click on the reset button, and in the warning message, again click on the reset button. After that, your AOL mail will be reset successfully.
  • Update the Mail App in Windows 10: Sometimes updating the application to the latest version can eventually lead to the solution of a common problem. Now, to update the mail app to the latest version, first press the Windows key and then type the Microsoft Store App in the insert box and launch the application. Then Search for the “Mail and Calendar” and click on the “Update” option. Once you will update the application to the latest version, then you can also add additional accounts or can update your existing accounts. Now you can successfully sync your AOL mail to the Windows mail application.

Problem 7: AOL Mail Not Working Currently Unavailable

If your AOL Mailbox is temporarily unavailable, then try to perform the below-mentioned troubleshooting methods.

  • Check the Status of AOL Server: If your AOL mailbox shows you a message that it is not available, then there are chances that the server is down from the backend. In case, if the mail server is down, then you don’t have any option to do. You only have to wait till it gets functioning again. You can easily check the AOL server status through different websites such as Down Detector, Outage Report, etc. However, if the server is up, then definitely the issue is only with your network.
  • Clear Browsing History & Disable Unwanted Extensions: When your browser’s history is not deleted for a very long time, then it can add unwanted cookies and cache in your browser which can further result in lagging while working on it. Also, some unwanted extensions can directly stop an application to perform efficiently. So, it’s recommended to keep your browser’s history cleared and disable all the unwanted extensions from your browser.
  • Disable Security and Safety Applications: A background running antivirus software can eventually stop the application to work properly. Antivirus and firewall software can block the connection of accessing the AOL mail. So, if you are facing the AOL mail currently unavailable issue, then disable all the security and safety applications. Now, restart your PC and open the AOL mailbox. This step can easily get this problem resolved.

Problem 8: AOL Mail not working on Android

If you are not able to connect to the server of AOL mail not working on your android mobile, then here are the troubleshooting methods that you can follow to get the issues resolved.

  • First of all, on your android device, open the AOL mail.
  • Now enter your login credentials and move to the incoming and outgoing server settings.
  • Shift to the manual setup option and enter the following settings.

AOL IMAP Settings

Server Address Imap.aol.com
Username Your unique AOL email address
Password Email login password
Port 993
TLS/ SSL required Yes

AOL SMTP Settings

Server Address smtp.aol.com
Username Your unique AOL email address
Password Email login password
Port 465
TLS/ SSL required Yes

AOL POP3 Settings

Server Address pop.aol.com
Username Your unique AOL email address
Password Email login password
Port 995
TLS/ SSL required Yes

Winding Up

So, that’s all with the possible issues and problems that an AOL mail user can face while working on the mail. We have also covered the best solutions and the methods for each problem. If you have any specific queries related to the AOL Mail account, then feel free to reach out to us through the help section. Our experienced professionals will be there to assist you.